

How to install and use FFmpeg on Windows 11/10
FFmpeg is a pop software for processing, converting, or manipulating video and audio files. The program is used for countless things similar rotating videos, scaling videos, extracting information about videos, and many others. It is an open-source plan that is simply awesome for video scaling, format transcoding, decoding, encoding, demuxing, streaming, filtering, converting audio files, recording live audio/video, treatment video and other multimedia files. This multimedia framework is designed for command-line-based processing of multimedia files, and you can make bones edits with single-line commands.
While the program is simple to utilize, accessing FFmpeg to execute commands is a piddling confusing. Installing and using FFmpeg can take a lot of time every bit you need to manually open the FFmpeg folder within the command prompt or Power Shell terminal to access the FFmpeg executive file to execute relevant commands for basic editing. If you are stuck with installing and using FFmpeg on your automobile, y'all are in the right place.
To make things uncomplicated, all you take to do is install FFmpeg and add the FFmpeg program to the Windows path using Environment variables. This way you tin directly admission FFmpeg from a Control prompt or Power Beat in any directory. In this article, nosotros explain how to install FFmpeg on Windows in order to access FFmpeg directly from Control Prompt or PowerShell
Install & employ FFmpeg on Windows 11/10
Go the latest FFmpeg build from the official website here. You can either download the 32-flake version or the 64-flake version that suits your organisation. Click the Download Build push button to kickoff downloading.
The plan doesn't piece of work straight on Windows x. Y'all need to add a programme to the organisation path using Surroundings Variables.
So navigate to the downloaded folder where the FFmpeg zip file is a shop. Right-click on the Nothing binder and click excerpt from the drib-down menu.
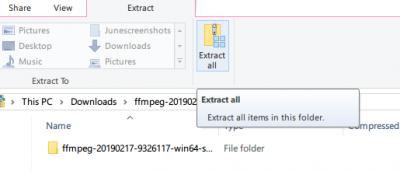
Select the folder or drive where you want to extract.
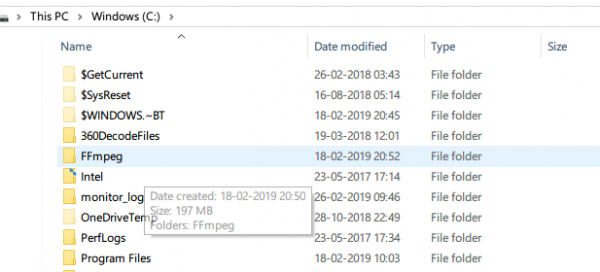
Next, rename the extracted binder. To rename the binder, right-click on a folder and click Rename from the drop-downwards menu with title FFmpeg-20180424-d9706f7-win64-static to FFmpeg.
Copy the FFmpeg folder and navigate to C drive. Paste the folder to the root of C bulldoze.
Once done, the next step is to enable FFmpeg using Command Prompt.
Add FFmpeg to Windows path using Environment variables
To utilize FFmpeg in Control Prompt, you demand first to add together the bin folder containing the FFmpeg executable file to your Windows path
In the Windows search carte, type Edit the system environment variables and click Enter. This will open up the system properties window.
Navigate to Advanced button and click Environment Variables at the bottom of the window.
In the Environment Variables window, Select the variable Path and click Edit to change the Path variable.
Click New and type the path of FFmpeg folder "C:\ffmpeg\bin\" and click OK.
Type the path directory according to the drive or folder where you take placed FFmpeg folder.
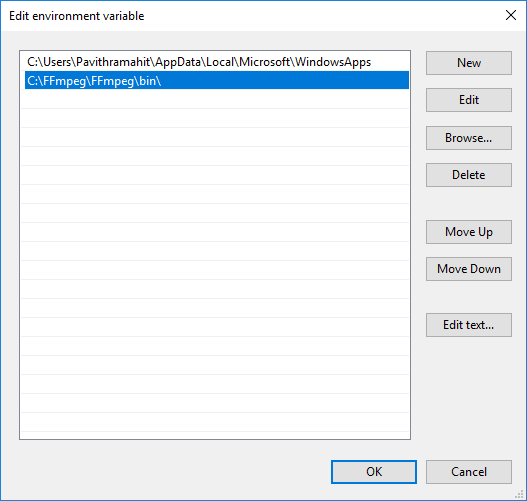
Once washed, the path gets added to the Surroundings variables. Click OK to utilise changes.
Verify FFmpeg path in Control Prompt
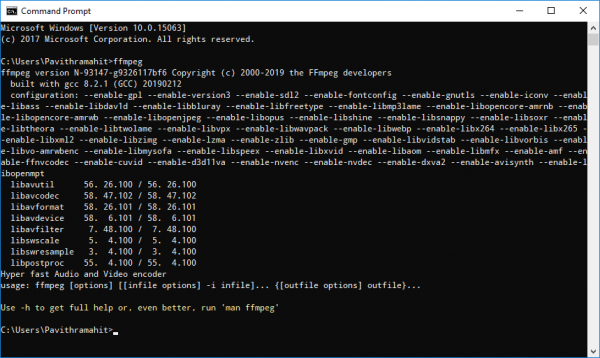
Launch Command Prompt and type the command FFmpeg in the command prompt last and striking Enter.
If the FFmpeg is added properly to Windows Path, the command prompt will display the details about FFmpeg like its version number, configuration, etc.

If y'all weren't successful, information technology only means that your command prompt did not recognize the commands. Cross-check to run across if y'all accept added the FFmpeg folder to the organization path properly.
Read: Fix Brazenness FFmpeg mistake on Windows PC.
That's all!

Source: https://www.thewindowsclub.com/how-to-install-ffmpeg-on-windows-10
Posted by: cuadradolifeatchas.blogspot.com
0 Response to "How to install and use FFmpeg on Windows 11/10"
Post a Comment